"Don't leave anything to what if. Just go."
-Matt Fraser

The workshop was structured into two parts; First half was all about pressing, starting with the strict press and then the push press; The second half was all about the split jerk, first learning about foot placement and timing of the feet. Then we put it all together and started to perform the split jerk.


1. STRICT PRESS
With the strict press we started as I always do, with the feet. Having our heels under our hips and feet facing out (11 and 1 on the clock). This gives us a stable base.
Next, we concentrated on squeezing the bum and turning our pelvis to tighten our stance even more, securing our base.
The next and most needed (but most often never used) is BRACING. I asked everyone to relax their stomachs, interlock their fingers and use their interlocked fingers to push their relaxed stomach in. Then used their stomach muscles to push their hands out. What this does is mimic a weightlifting belt, and helps you feel how to BRACE.
Now we move to the bar. Hand width is very important and depends on your body structure depends on how wide your hands are. The most important thing is that they are equal distance on the bar. I line the tip of my FLAT thumbs with the edge of the gnarling (the rough bit of the bar) and then grip. This means my hands are equal distance.
Once we have found our hand width, we want to make sure the bar is sitting ON and not in front of the shoulders (pressed against the base of the neck). This way the body takes the weight and not our biceps.
Telling people to make a double chin usually get a bit of a giggle but by pulling our chin back when we are ready to press the bar up, allows the bar to go straight up and past the face, rather than arching the back. Once the bar has cleared the face, I told everyone to push their heads through, creating a stronger position to finally lock the bar overhead.
AT NO POINT SHOULD OUR BODIES BE ARCHED. THINK OF A PLANK THE WHOLE TIME AND REMEMBER THAT TIGHT PELVIS!
RECAP – STRICT PRESS
Heels under hip – feet 11 & 1 o’clock – bum tight – pelvis tilted – brace stomach – double chin – press in front of face – head through – finish overhead.
2. PUSH PRESS
Using what we learnt in the strict press, we move to the push press. Like before we make sure our heels are under our hips, feet 11 and 1 on the clock. We dip our body, making sure our knees follow the direction of our feet (out), making sure to keep our torso vertical as if we were standing upright. Here we should tighten our quads (the muscles on the front of our thighs) and only dip as far as the tightness allows; I use the analogy of springs. Our quads are the springs and when we dip and tighten, we are now ready. This is the same as pushing a spring in. With this tension we release, pushing the floor away from us with as much force as we can muster, the same as when a spring is released.
During the workshop, once we’d established ourselves as springs, we worked on the next drill:
We had the bar on our shoulders, heels under our hips, feet 11 and 1, brace stomach, knees following feet (tighten quads), double chin and go. I wanted the group not to press the bar but to push it vertically as high as they could with just their body. This helps feel the extension and shows how high the bar can travel (usually around forehead hight).
Next was performing the push press. Using what we had just learned and the finishing pattern from the strict press we could perform the full movement. Making sure to put the head through when the bar passes our head and finally press the bar to secure overhead.
RECAP – PUSH PRESS
Heels under hip – feet 11 and 1 – bum tight – pelvis turned – brace stomach – knees follow feet – push through the floor – double chin – head through – finish overhead.
3. JERK FOOTWORK
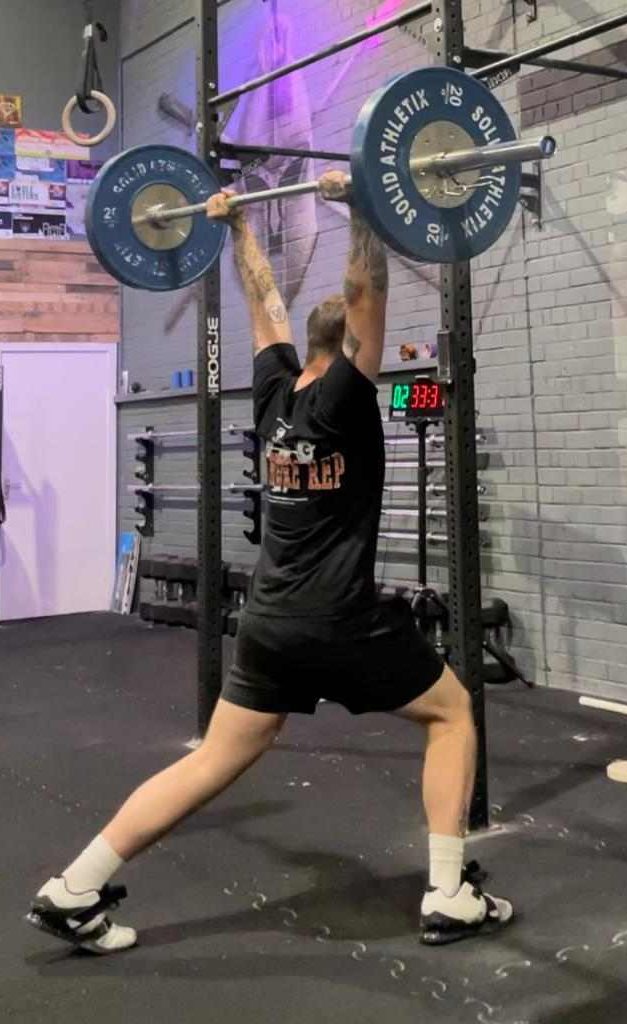
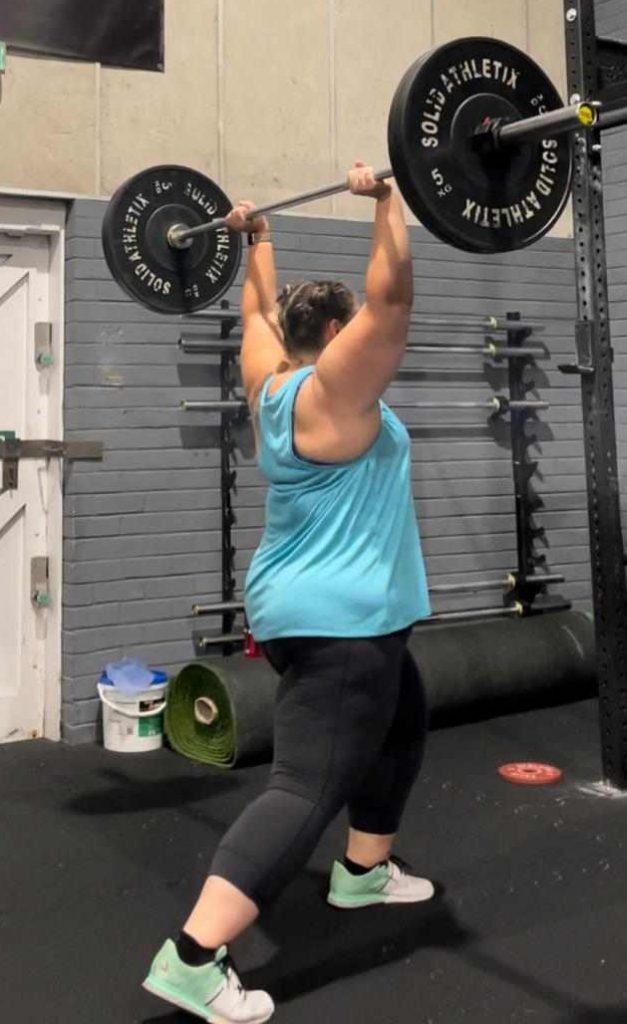
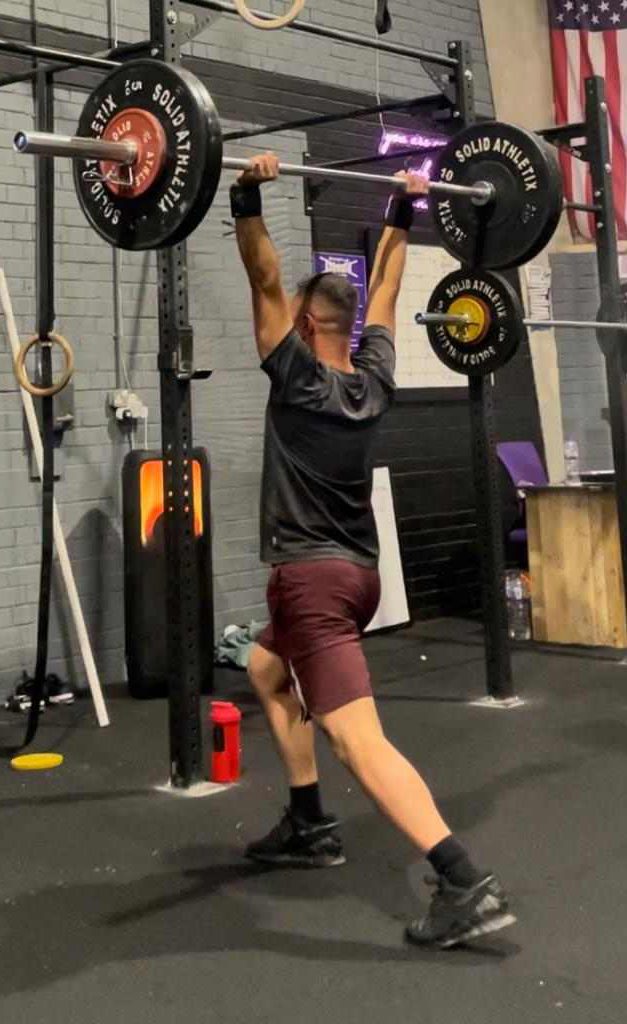
This part is my favourite, almost like a salsa (the dance, not the dip). Concentrating on where our feet are placed, I wanted each foot to be just a little wider (1/2” to 1”) to get the feet wider in the receiving position, however as before I wanted the group to have their feet facing 11 and 1. From here we stepped back with the back foot turning the heel out (this is an exaggeration to overcompensate, our heels will not be this far out when we move at speed). The back foot is to catch your body in the stance. We then stepped forward with the front foot, our heel also facing out (also exaggerated), to stabilise the body in the stance.
Once we feel stable, we return with the front foot and finish with the back foot (when the bar is overhead and we return with the back foot first, there is a chance we can over balance and the bar goes forward. This is why we recover with the front foot first). Like a salsa; back foot- front foot- front foot- back foot.
There is nothing wrong with moving both feet at the same time when receiving the bar. However, there is a possibility that your position will almost always be different. By placing the back foot and stabilising with the front you can get the same position nearly all the time.
Next was adding speed. I asked the group to listen to the timing as I sounded two claps with my hands. The first clap was for the back foot and the second was for the front. I started with the claps about two seconds(ish) apart (clap…clap. Back foot…front foot). When I could see everyone was stable, I would say recover (front foot…back foot). This was ALWAYS about two(ish) seconds apart to mimic having weight overhead.
Slowly but surely my claps got faster and faster until everyone was moving so fast (back foot…front foot) that it was almost as though both feet were moving at the same time.
Next it was time to do it all over again, this time on our tip toes. This was to mimic being at the end of our extension. Starting off really slow everyone would go on their tip toes, I would clap twice and the group would copy the timing. Faster and faster until everyone was moving at speed.
Not everyone’s feet were at the perfect position which was ok. I re-adjusted some people but for this exercise and the workshop it was about getting used to a movement pattern that would be a bit foreign.
RECAP – JERK FOOTWORK
Feet slightly outside hips – tip toes – back foot – front foot – stabilise – front foot – back foot – recover.
4. SPLIT JERK
With everything that the group had learnt throughout the day; From the strict press we had learnt our base (starting position); From the push press we learnt our extension; and from the footwork we learnt how to get under the bar. Now we put it together!
Starting with our heels under our hips, feet facing 11 and 1, tightening bums and tilting pelvises. Big breath in and brace. Knees following feet (tighten the quads), double chin and push through the floor. Back foot lands and the front foot stabilises. Head through and support the bar overhead. Front foot steps back. Back foot steps forward. Stabilise the bar overhead and now you have performed the split jerk.
RECAP – SPLIT JERK
Heels under hips – feet 11 and 1- bum/pelvis – brace – knees follow feet – push through floor – double chin – back foot- front foot – head through – stabilise- front foot- back foot- stabilise overhead.
This is what I would say is a base structure to these three movements. These are methods and techniques that I have picked up over the years and find help with my training and coaching. Different coaches may be similar or slightly different in the way they teach. There is not just one way to learn, to teach or to perform these movements, I only ask that you take knowledge from lots of sources and find what clicks for you. Our coaching staff at Strength Lab are always there to help (unless they are training) and like myself want to make your experience and knowledge better.
Thank you. Happy lifting!
